EDIT/UPDATE: I finally plunked down for a Sony A7rii about 4 months ago. I’m a loyalist still, I foresee this as a kind of temporary departure from Nikon. That said, some time ago, I actually decided the Cineflat was a little TOO flat, and I took the ‘Flat’ profile from my partner’s D810 and did the same trick- loading that onto the D800. I can post a zip of that profile if anyone wants to try that. It was a little more ‘natural-looking’ flat and maybe less work to grade. Also, I’m going to start using DaVinci resolve for grading, soon. A reader commented that they were having trouble installing… I think it’s important to format the SD card, put only the profile on there in a folder called NIKON, then you can select it to load. Cheers! – MF 4/19/18
I lust over my friends’ work with RED cameras, or Sony FS7’s or even Arri cameras. The stuff is incredible, especially when they put them on a Movi or up in the air! At the moment, a Sony FS7 would be a massive investment I can’t make.
So I’ve made an effort to make the most with what I have, which is a Nikon D800. My business partner has a D800E and a D810, so we’re basically shooting the same equipment. Some of our bread and butter work is shooting video for architectural or high end real estate listing videos. These often happens in nightmare situations shooting indoors with bright windows. Also, we are trying to push our aperture as small as possible to increase depth of field and the ISo has to shoot up to accommodate. As a longtime still shooter who shoots everything in RAW, I have tended to ignore the color profile settings in my camera. The video footage I was getting however, was driving me nuts… dark shadows with lost information, blown out highlights, nothing I could do to balance it satisfactorily.
Get and install Cineflat on your D800/E/810
After some research, I found Cineflat, a custom profile for Nikon. Here an informative article by the folks behind it. If you want to just read my little description and get right to it, here is the download. To get this into action,
- download that zip,
- extract/expand it on your computer
- put the extracted folders (keeping the structure) on an SD card
- Put that card in, and go into the menu to Manage Picture Control (in the Shooting menu)
- Choose ‘Load/save’ then ‘Copy to camera’ and select the new profile.
To use it, go back out to the Shooting Menu, and choose Set Picture Control and choose the Cineflat.
The results:
For a quick explanation of why this is needed… even though the D800 shoots wonderful RAW still images with impressive dynamic range, the video is highly compressed. This is essentially like shooting JPEGS with a severe compression and ‘look’ applied. I have been shooting Standard since I got it, and outdoors I haven’t worried about it, but indoors the images suffer greatly. The Neutral is a little better (and the D810 has a ‘flat’ profile that is still not as optimized as Cineflat). In any event, what you get when you bring this into Premiere Pro and try to grade it, there’s little room to work with it. If you try to bring up the shadows or play with the curves it turns into a mess. So what CINEFLAT does is to apply a carefully constructed curve that preserves detail in the shadows and in the highlights, leaving a wonderfully flat image to grade with the tools in Premiere or other grading software.
I have to shoot 23.976 footage with my D800, and therefore I shoot video at 1/50 shutter speed (you want to be as close to 2x frame rate with your shutter speed). I did a quick and dirty test in my kitchen to show the same shot with 3 different profiles at exactly the same settings.
Of course, the CINEFLAT looks hazy, milky, or well, ‘flat’. But now I will take this into Premiere and apply some adjustments to bring back some contrast and depth. The important thing is I have information in all the areas of the image to work with!
D-Noise with Neat Video
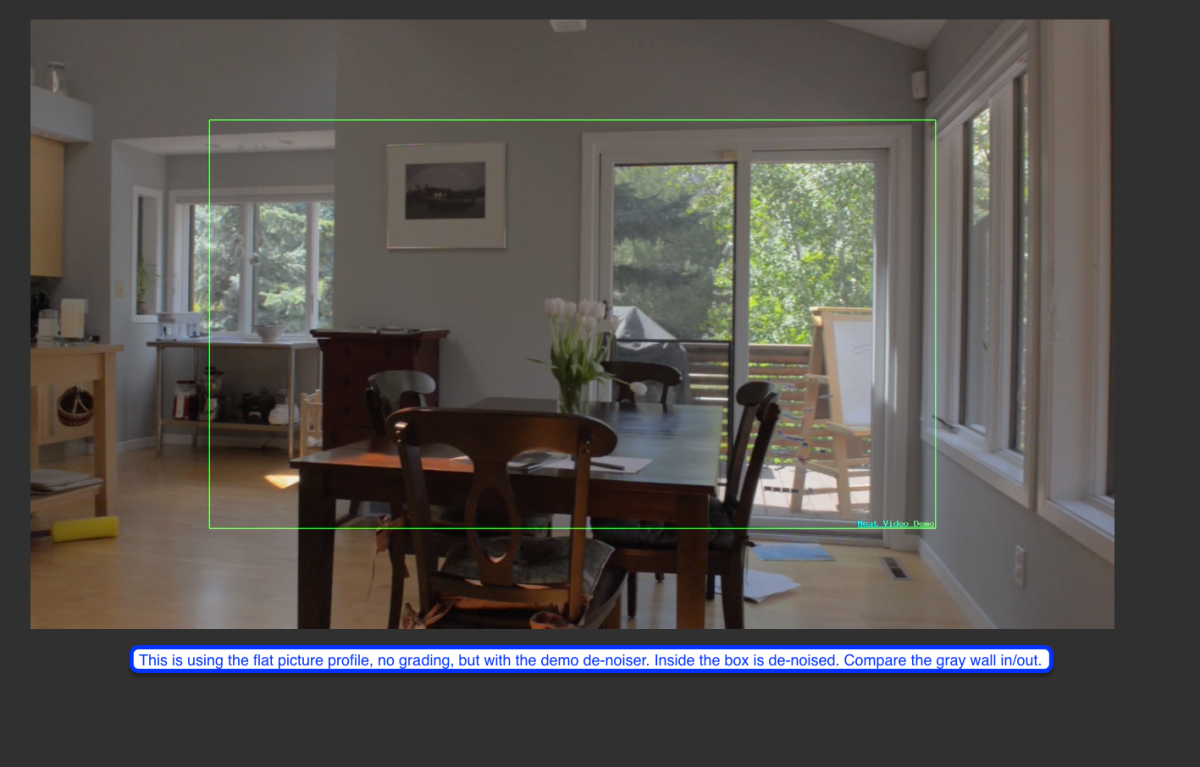
The noise in the video I get out of my D800 is also a little embarrassing. When shooting at small apertures, trying to keep sharp focus throughout, the noise gets worse and worse. So I checked out Neat Video and ran a test. I’m buying the Pro version as I write, but here is the demo version test, showing the de-noised video inside the green box.

